You want a super cost-effective way to do remote monitoring of your sensors and assets? Using Valarm compatible sensor hubs with long range WiFi antennas will save you a load of money on internet connectivity fees for uploading real-time sensor data to Valarm Tools Cloud, especially if you already have on site internet access!

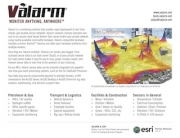
Map of Valarm sensor units monitoring water well depth and flow rate of remote wells in Anza-Borrego desert, San Diego County, California. The WiFi base station is at the golf course on the left. The Ubiquiti WiFi antenna sends internet connectivity to the water wells on the right part of the map.
Valarm’s an open platform so you can use your most convenient way of internet access for connecting to Valarm Tools Cloud. In some remote areas your best fit for internet connectivity may be a 3G/4G GSM or CDMA cell network. Using the wireless techniques in this article you can lower your costs by only paying monthly fees for 1 cell modem, then sharing the internet access to Valarm remote monitoring units that are miles or kilometers away!
In this write-up we’ll help you set up Ubiquiti and MikroTik routers and antennas to share internet access over long distances. In the photo above there’s an oil & gas customer’s deployment with a solar powered Valarm water monitoring unit connected to a Ubiquiti antenna that receives internet access from another distant monitoring box with a Verizon cell network modem.
The map on this page shows another example of a Valarm remote monitoring deployment using long range WiFi. This technique has been quite useful for a variety of remote monitoring deployments like:
- Water well depths and flow rates
- Tank level monitoring in sheds with mains power or directly on top of tanks with solar panels
- Water usage for agriculture and government
- Stream water quality monitoring
- Noise / sound + micro-climate / weather monitoring
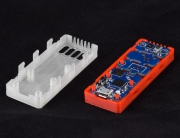
In this example blog post you’ll see how to set up Ubiquiti Nano Station Loco M2 WiFi antennas as base stations and MikroTik RouterBOARD SXT 2NDR2 CPE units as receiver units.
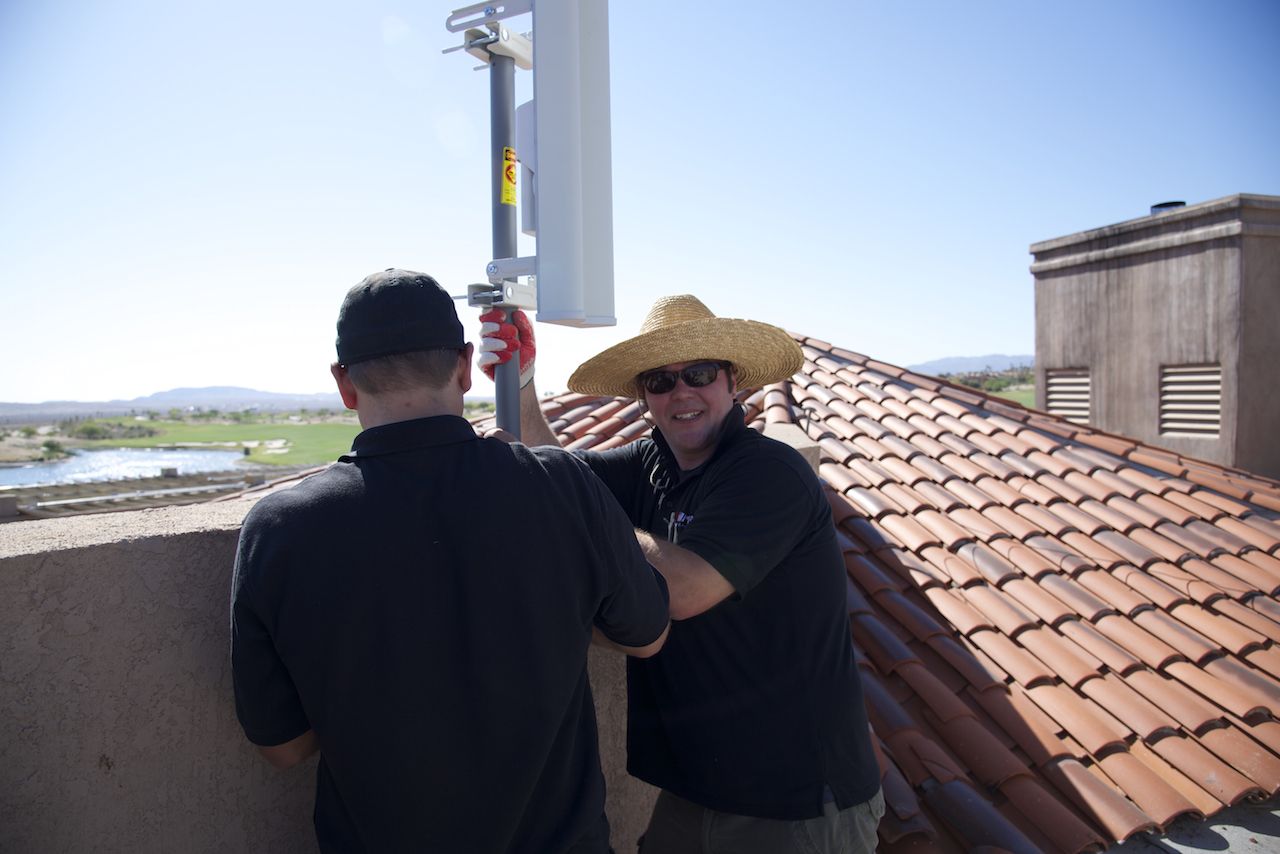
Pawel & Edward deploying a long range Ubiquiti WiFi antenna on the roof of a golf course building / restaurant cafe in the Anza-Borrego desert near San Diego, California.
Important note: in some cases when your distance you’d like to cover is not so great you can use 1 outdoor, weatherproof WiFi base station antenna to broadcast directly to Valarm compatible WiFi sensor hubs. This is exactly what we did for these solar powered tank level monitors. In other cases, for longer distances you can use a long range WiFi antenna as a receiver unit and connect the WiFi antenna directly to a Valarm compatible Ethernet sensor hub. We did just this for these noise / sound monitoring units as well as this water usage sensor deployment.
First, let’s configure the outdoor, weatherproof Ubiquiti antenna to broadcast WiFi internets to faraway lands. Be sure to deploy your antenna high up so it has direct visibility to your Valarm remote monitoring units. Preferably mount your WiFi antenna high up on a pole or on the roof of a building and aim it appropriately. See the photo for an example where we’re deploying a Ubiquiti antenna on a rooftop.
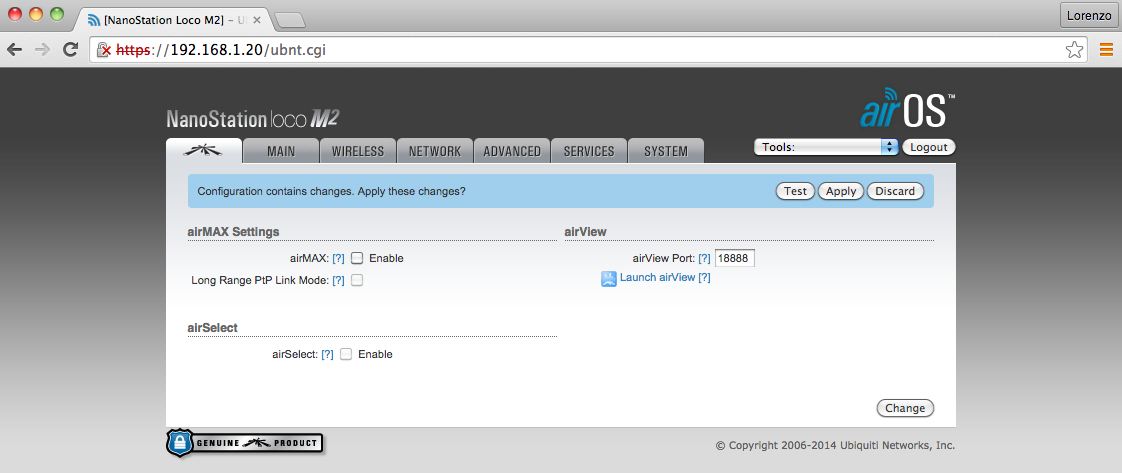
To configure your Ubiquiti connect it to your computer and login by pointing your web browser to 192.168.1.20. If you haven’t change your login credentials then note that the default login and password are ubnt. Once you’re logged in make sure that airMAX is not enabled. This is 1 of the proprietary WiFi formats that the majority of these wireless antenna manufacturers have enabled by default. However, in order to open the network up to any device with WiFi, like Valarm sensor monitoring units, disable proprietary formats. See the settings in the screenshot below.
Next you’ll see how we set up each of the tabs up top, e.g., main, wireless, network! Note that this is just 1 way to configure your base station that has worked for us. There are plenty of ways to share internet access to enable access for remote sensors to Valarm Tools Cloud and we’re constantly learning more ways to best fit the needs of our customers in a variety of industries. Please don’t hesitate to contact us if you have any questions, comments, or suggestions!

The main configuration screen for the Ubiquiti.

Wireless configuration screen – Access Point mode, SSID name, and your wireless security key setup
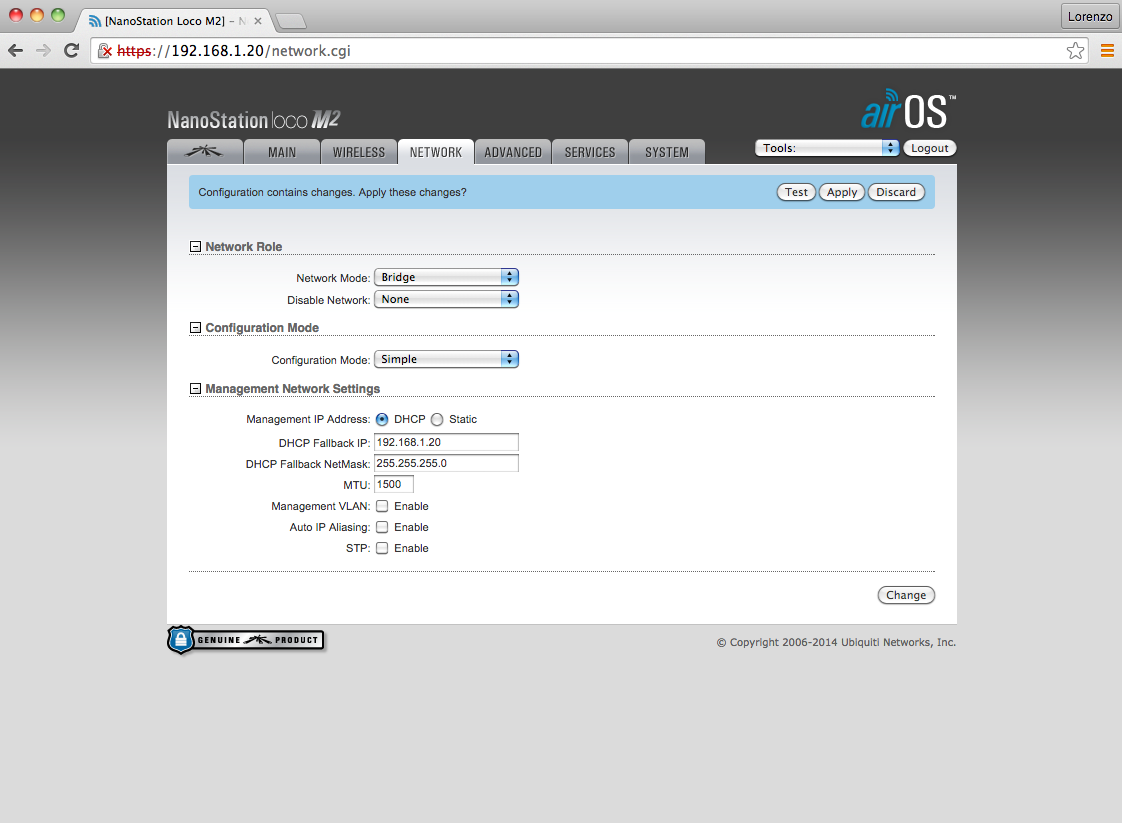
Network configuration screen – bridge mode means this antenna is plugged into a live internet connection, e.g., from a router, and this antenna broadcasts the internet connectivity.
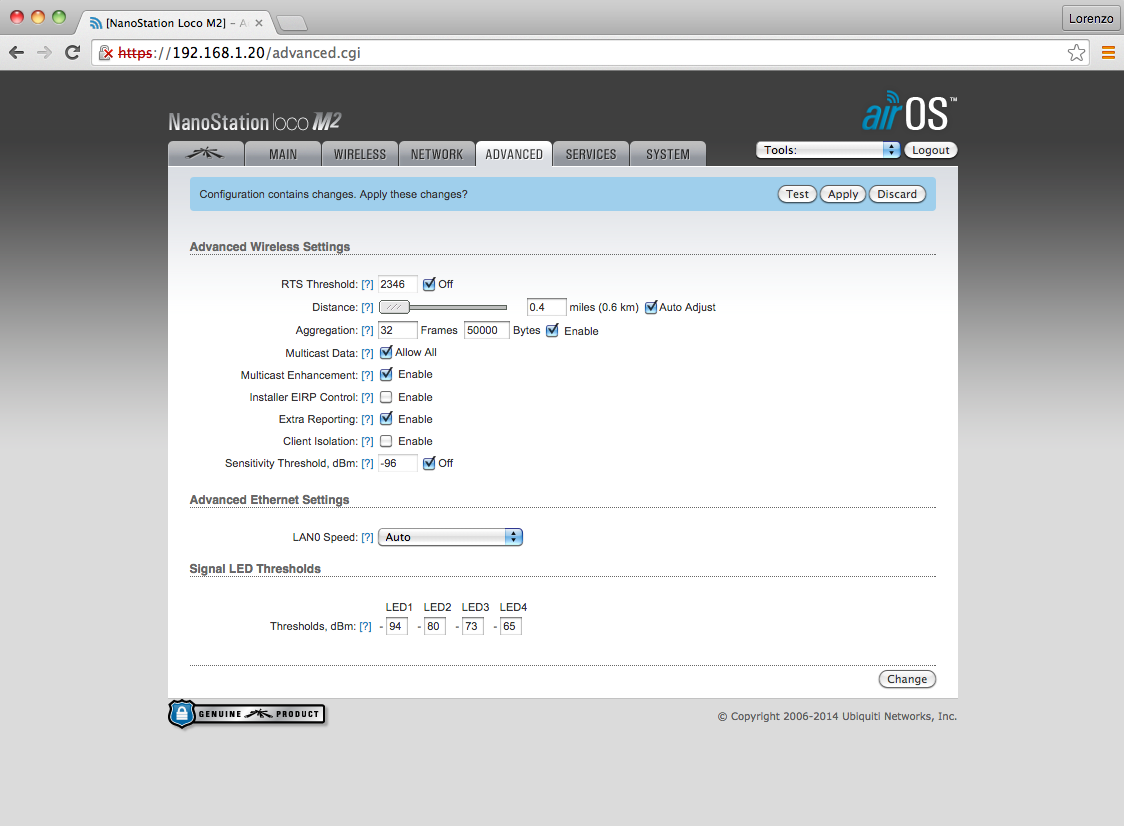
Advanced settings we use on this Ubiquiti Nano WiFi Station Antenna

Services settings we use on base station Ubiquiti antennas for Valarm remote sensor and monitoring solutions.

Lorenzo & Edward with a Valarm unit connected via long range WiFi to monitor real-time noise / sound levels at a natural gas compressor station
Once the base station has been configured to broadcast WiFi you can connect to it with any WiFi enabled device. In some cases when your Valarm monitoring units are near your base station this is all you’ll need to do and you can connect to your network using Valarm compatible WiFi sensor hubs. We did exactly that with these solar powered units that monitor chemical and fluid levels in all of the tanks on a tank farm.
However, if your remote monitoring units are really far away, e.g., miles or kilometers then we recommend using long range WiFi antennas to receive internet access and then share that locally with a Cat5 ethernet cable plugged into a Valarm compatible ethernet sensor hub. We did this with MikroTik RouterBOARD SXT CPEs in this noise and weather monitoring deployment for the upstream oil & gas industry. You can see a picture of one of these MikroTik antennas on the right. Hint: it’s the disk looking thing above the Valarm box and solar panel at the top of the post.
Next we’ll show you how to configure the MikroTik WiFi antennas to receive internet access from the Ubiquiti WiFi antenna base station. From there you can connect any of your Valarm remote monitoring sensors to Valarm Tools Cloud for viewing your sensor data in real-time on maps, graphs, downloading it, and forwarding it via our APIs.
First plug your MikroTik WiFi antenna into your computer and connect to it with your web browser by going to http://192.168.88.1. Below is the Quick Set screen with the settings we use.

There’s a bunch of options and settings possible with these WiFi antennas, especially the MikroTiks, we realize it can be overwhelming to see so many 3 and 4 letter acronyms! 🙂 Below we’ll show you the rest of the configuration settings we use to connect the MikroTik WiFi antenna to the Ubiquiti base station configured above.

Under Wireless and Interfaces click the Scanner button to find your WiFi network you’d like to connect to, in this example it’s the Ubiquiti antenna we configured above!

Find your antenna in the list – in this example we want the Ubiquiti NanoStation Loco!

Select your WiFi network and connect to it
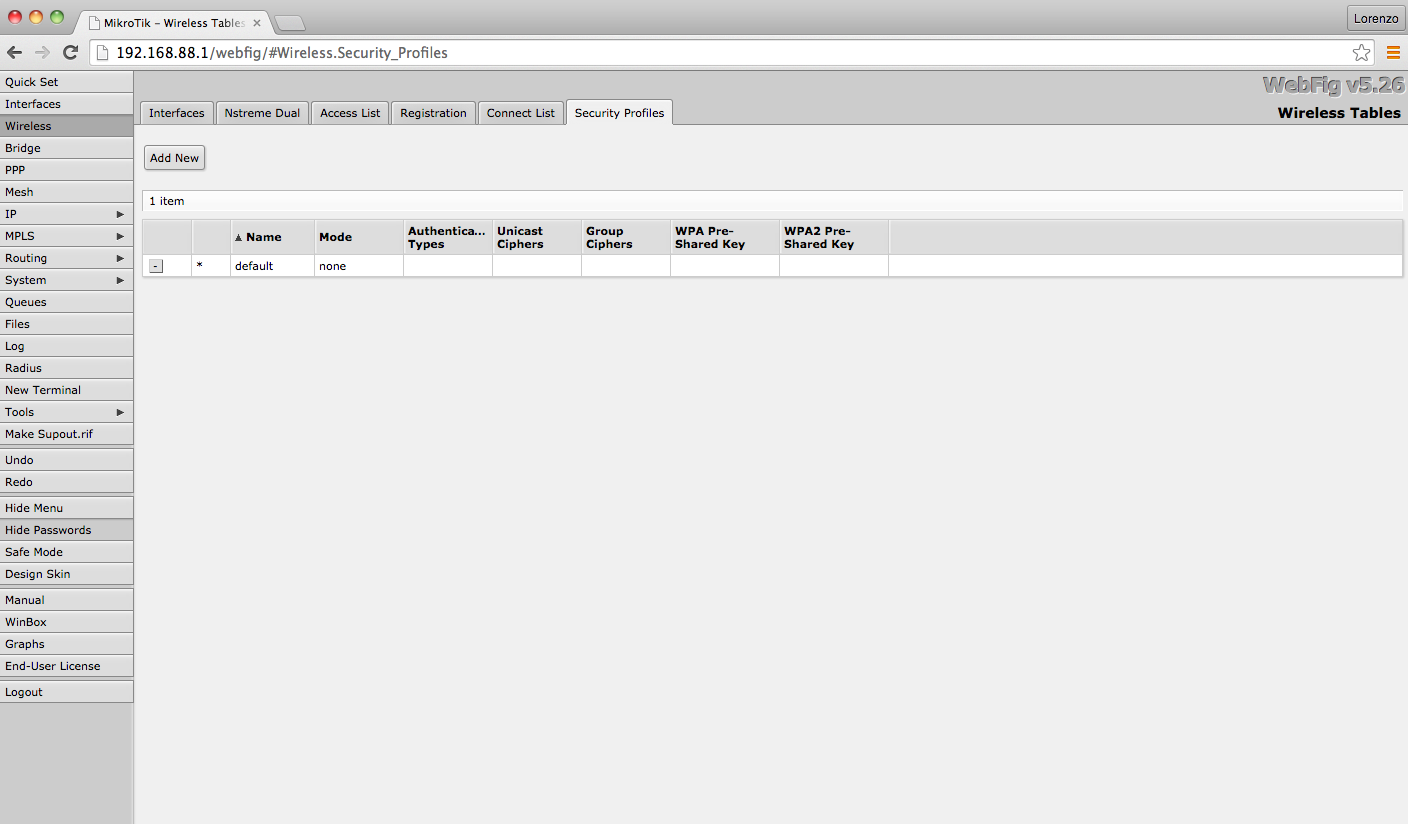
Use the security profile tab to configure the password / key you set for your WiFi network

Enter your WPA2 pre-shared key / password for connecting to your WiFi network. Check to make sure these match the settings of your base station, e.g., the Ubiquiti antenna that we configured above.
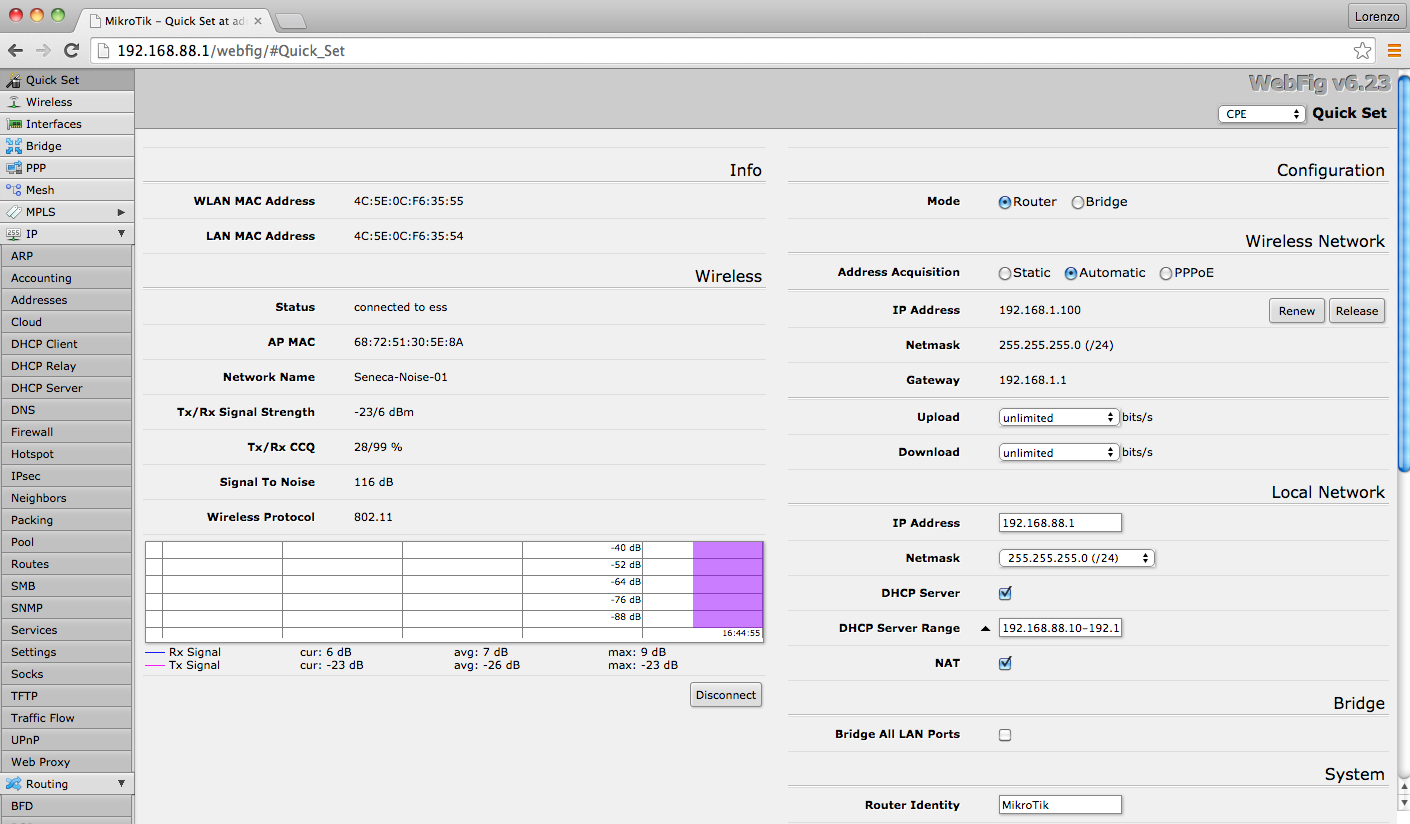
Back on the home screen we can see the outdoor, weatherproof MikroTik long range WiFi antenna has successfully connected to the long distance Ubiquiti WiFi antenna!
Here are more photos of the 2 Long Range WiFi antennas configured in this write-up:

Ubiquiti Nano Station Loco M2 WiFi antenna

MikroTik RouterBOARD SXT 2NDR2 CPE
Lessons learned:
- Remember to disable the WiFi antenna manufacturer’s proprietary data formats so you can connect to Valarm Tools Cloud with any Valarm sensor connectors.
- So far for the price point, durability, strength, and reliability we’ve been happiest with Ubiquiti, MikroTik, and TP-LINK WiFi hardware.
- Be ready to use a variety of hardware to attach WiFi antennas to buildings or posts with handy items like cable ties and/or hose clamps.
- Shooting WiFi for miles / kilometers is an awesome, cost-effective way for our Valarm Tools Cloud customers to get remote sensor data to the cloud – we love it! 🙂
Now that you can easily and cost-effectively get internet access in really remote locations, all that’s left is to configure your Valarm sensor connectors, which is really easy with these long range WiFi antennas. If you haven’t already done that then follow this step-by-step video tutorial that shows you in less than 5 minutes how you can easily connect your remote sensors to Valarm Tools Cloud.
Have a look at our customer stories page for more examples of how a wide variety of technologies and manufacturers make it easy and cost-effective for you to do remote monitoring with Valarm software for things like:
- Monitoring Fluids & Water
- Water Quality Monitoring in Streams
- Piezometer / Vibrating Wire Monitoring for Mining and other Industries
- Water Well Depth & Flow Meter Monitoring in Pennsylvania
- Agriculture / Viticulture
- Airborne CO2 & Air Quality Monitoring with Drones
- Water Level Monitoring for Natural Resources / Oil & Gas
- Solar Powered + WiFi Tank Level Monitoring
- Mobile Air Quality Monitoring for City Governments
- Water Flow and Water Usage Monitoring
- Remote Tank Monitoring in Real-Time
- Monitoring Water Depths / Levels and Usage in Southern California Water Wells
Thank you for reading and please don’t hesitate to contact us if you have any questions, comments, or suggestions!