How do you use AirBeam AirCasting Air Quality Sensors with Valarm Tools Cloud / Tools.Valarm.net?

 That’s a lot of the word Air above. And linking AirBeams + Tools.Valarm.net is exactly what you’ll learn in this here write-up.
Recently, our IIoT / Industrial IoT Customers have been doing more and more remote air quality monitoring, like South Coast Air Quality Management District (a.k.a. SC – AQMD), the California government agency responsible for air quality monitoring and compliance in Los Angeles, Orange County, and the majority of Southern California. Our friends over at Sonoma Tech sent us an AirBeam air quality sensor because they need to attach a boatload of AirBeams to Tools.Valarm.net. So we’re showing the resulting instructions here.
With AirBeam sensors + Tools.Valarm.net, we’ll go step-by-step in this here HowTo Tutorial. You’ll see how to map (in 2D and 3D on earth globes!), graph, forward your sensor data with our APIs like JSON, and just about anything else for your air quality monitoring needs. Get excited and ready to map your pollution levels, dust, fine particulate matter a.k.a. PM2.5!
Here’s what you need (in addition to your AirBeam Air Quality Sensors) for each of your remote air quality monitoring box units that you deploy. These pieces and additional sensors are all available for you at Shop.Valarm.net:
- Sensor Hubs (GSM cell network, Ethernet, or WiFi, whichever internet connectivity works best for you in your deployment locations)
- Serial TTL sensor adapters
- GPS / GNSS sensors for real-time location awareness (Note: GPS-tagging is awesome, but optional!)
Since now you’ve got all the hardware above you need for air quality monitoring with your AirBeams, let’s get started on the next steps.
- First off, you’ll need to download the Arduino IDE software for your computer’s Operating System and install it.
- After you’ve installed the Arduino IDE, download this DHT-sensor-library-master zip file. Unzip that zip file then in your Arduino IDE go to Sketch -> Import Library and select the folder you just unzipped with the DHT sensor library for talking to the temperature and humidity sensors inside of each AirBeam.
- Download this Arduino .ino file that has customized code for outputting the AirBeam air quality sensor values as CSV, a.k.a., Comma Separated Values, format.
- In the Arduino IDE, do File -> Open and open the Arduino .ino file you downloaded from the link in the previous sentence that puts the AirBeam air quality sensor measurements into a format easily uploadable to Valarm Tools Cloud / Tools.Valarm.net.
- The AirBeam air quality monitoring unit has an Arduino Leonardo inside of it. Share this secret with the Arduino IDE by going to Tool -> Board and selecting Arduino Leonardo.
- Make sure your AirBeam is turned on and connected via Micro USB to full size Micro USB cable to your computer.
- You may need to make sure your Arduino IDE is set to output to the Port with your AirBeam. Do this by going to Tools -> Port in the Arduino IDE and selecting the port your AirBeam is plugged into.
- Now you’re ready to upload the new Arduino source code to AirBeam. Upload the code by clicking the arrow pointing to the right that’s in the AirBeam code window. You’ll see a message at the bottom telling you it’s uploading and then when it reads Done Uploading you’re all done reprogramming your AirBeam.
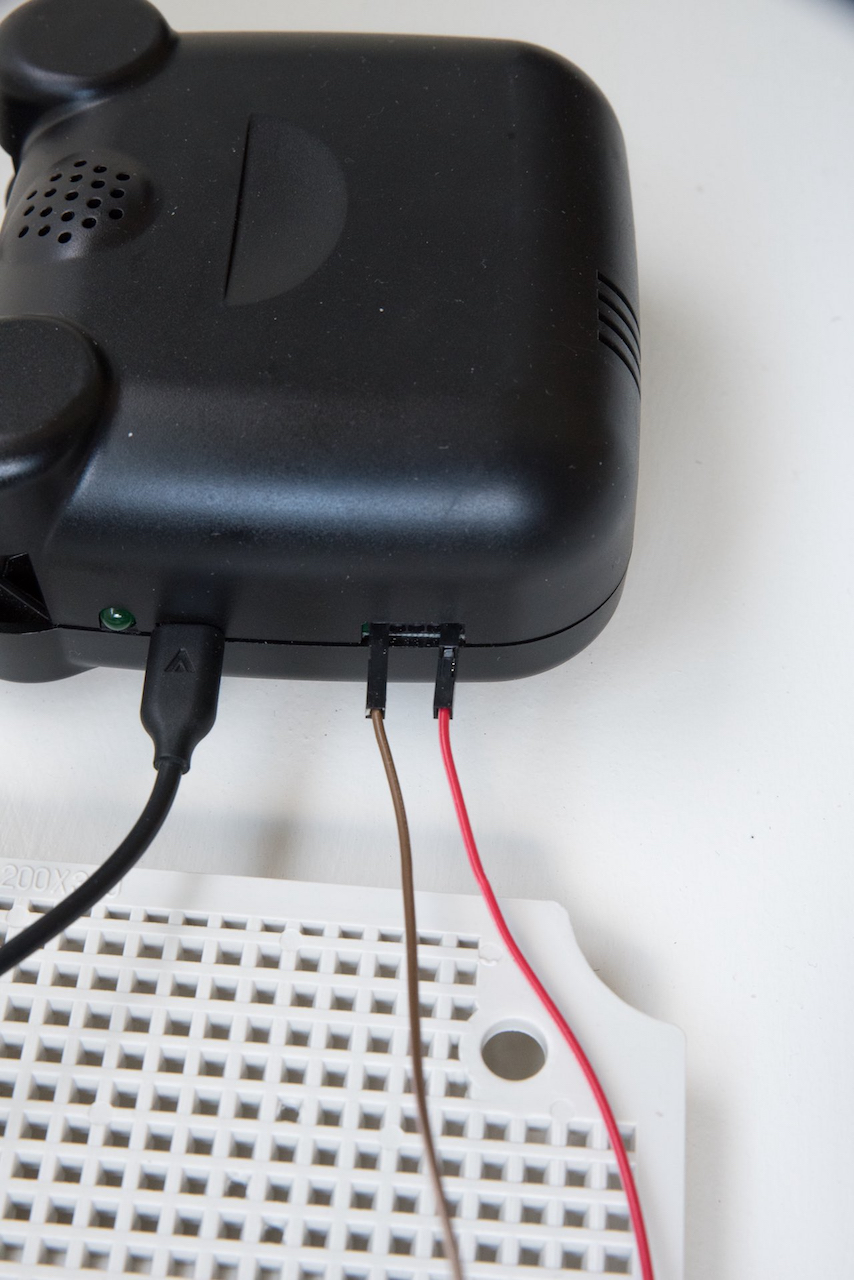
 Next you’ll need to connect your Serial Sensor Adapters to your AirBeam units like you see with the red and brown wires we used in the photos on this here blog post.
Cables with solid pins on 1 end work nicely for going into the AirBeam. Connect 1 end of a wire into the pin on your AirBeam that is the farthest away from the USB port – Red Wire in the photos.
The other end of this wire (Red Wire in the photos) you’ll screw down the wire to the RD port on your serial sensor adapters.
Then you’ll need a 2nd wire that connects to the Ground on your Serial Sensor Adapters. This is the Brown Wire in the photos. The other end of this wire connects to the pin on your AirBeam that is closest to the USB port.
 Download the virtualhub software if you don’t already have it. Start virtualhub and connect to it by going to http://localhost:4444 in your favorite web browser.
Connect your Serial TTL sensor adapter to your computer with a handy Micro USB to full size Micro USB cable.
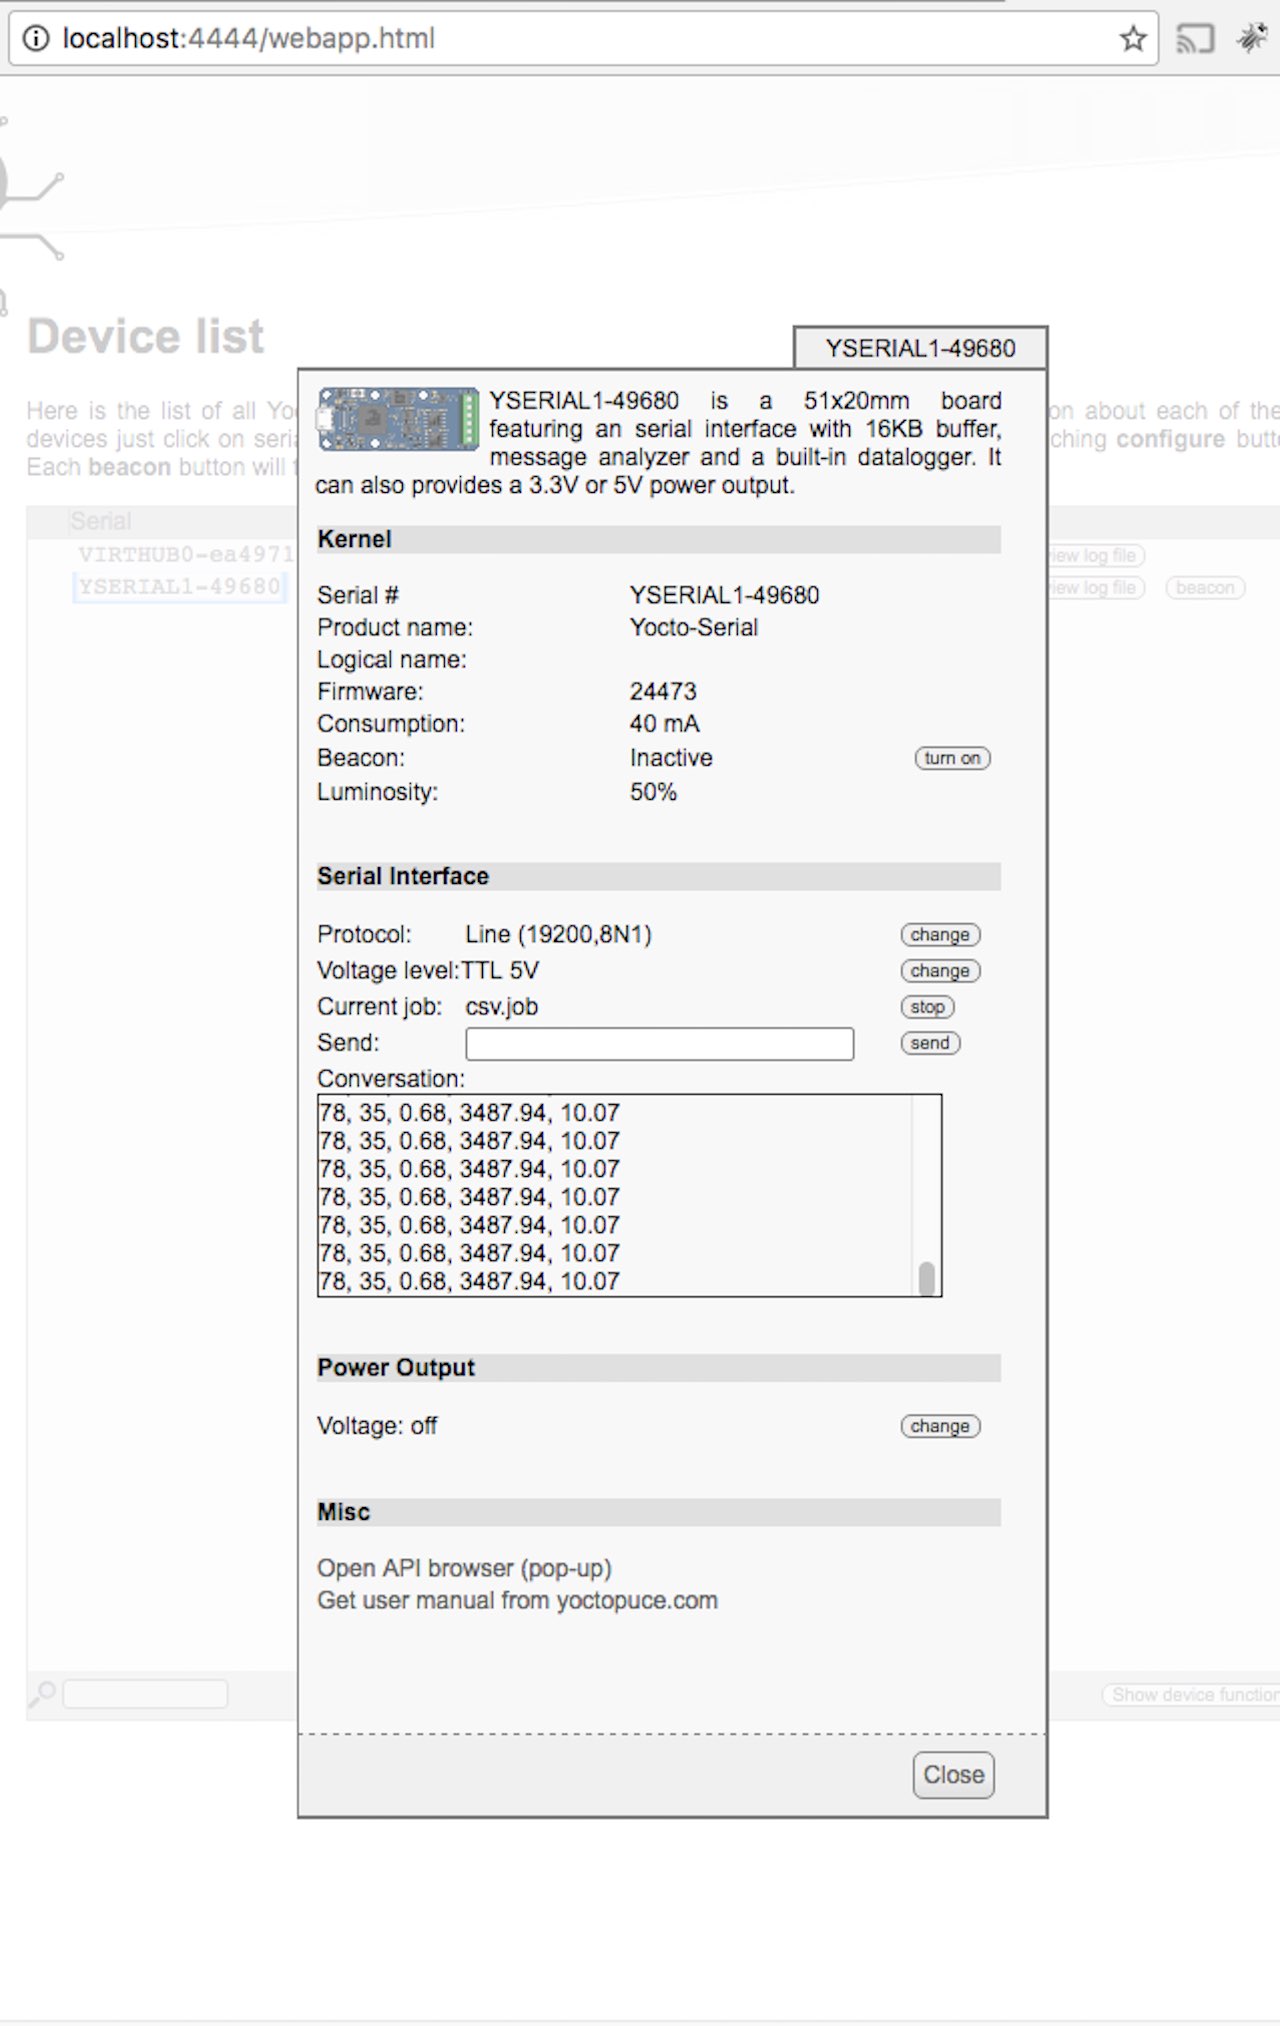
You’ll see your serial sensor adapter in your Device List in virtualhub. Click the Serial #, e.g., YSERIAL1-XXXXX, in the Device List and you’ll see a window similar to the screenshot you see to the right.
However, you probably won’t see the conversation with the AirBeam sensor output values yet. You’ll need to set up the Serial TTL Protocols so they read just like you see in the screenshot. Click the change button and set the Protocol to Line-Based with a baud rate of 19200 and 8N1 for the parity, stop bits, and all that fun stuff.
Change your Serial sensor adapter settings to match the settings you see in the screenshot here. Then you’ll start seeing the conversation with air quality sensor values.
 Next you’ll set up a .job file to automatically upload the CSV air quality sensor data to Valarm Tools Cloud / Tools.Valarm.net.
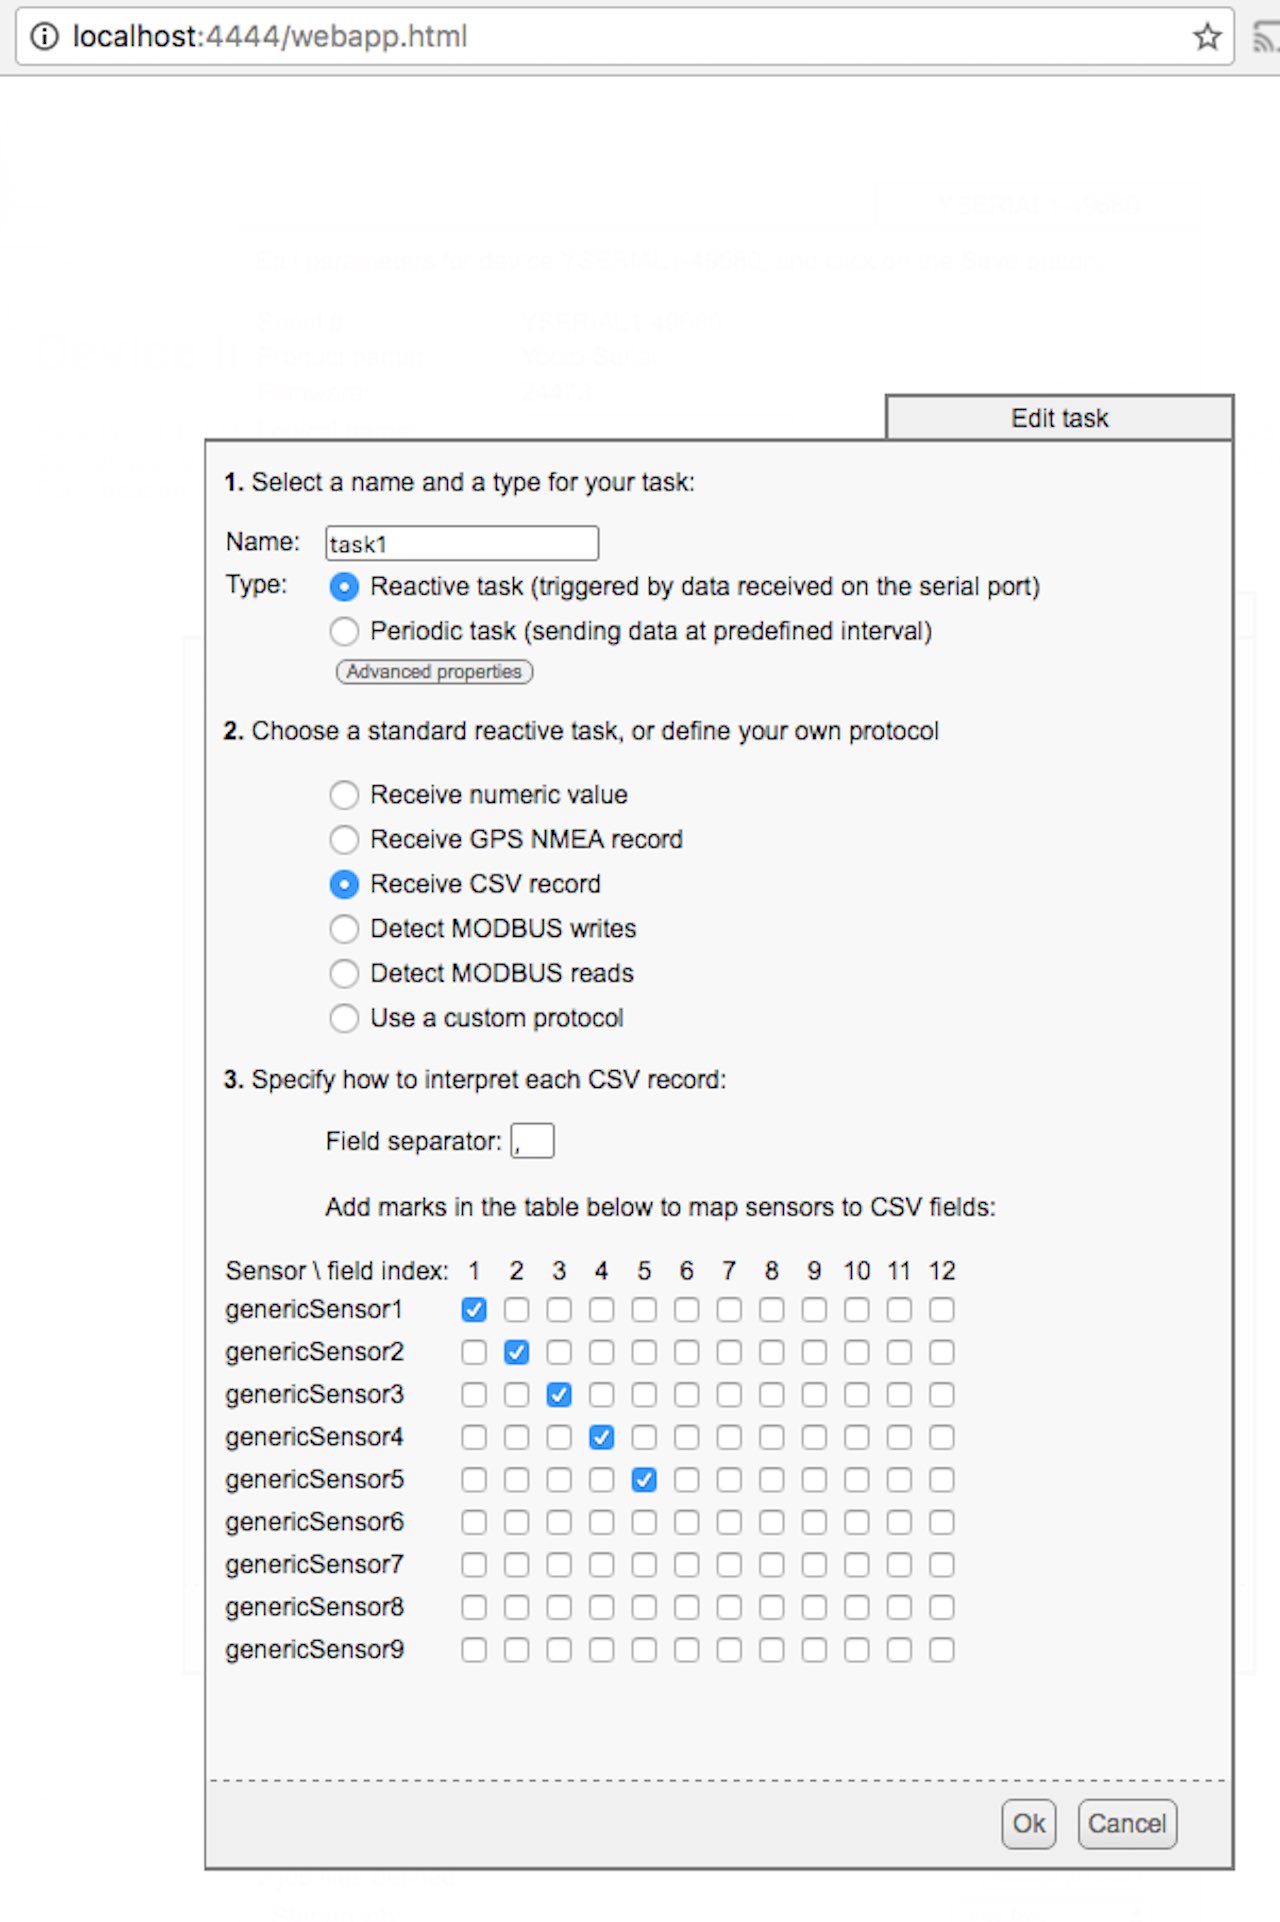
You can see in the screenshot that we named the job file csv.job but you can call it whatever you want, i.e., latefordinner.csv.
You’ll need just 1 task in the .job file. Create a task in your new job file and make it a Reactive task type. Select Receive CSV record in the radio button list.
Double check and make sure that the field separator is a comma, which it probably is by default.
The AirBeam reports sensor values that you see in the CSV output, and you can change the Arduino code to change the order and what you want to output. Hence it may look different than the Conversation screenshot on this blog post! Here is 1 example of output order:
- Output Count – how many times the data has been averaged then written out to the serial output where it can be sent up the chain
- Analog Count
- Temperature in Fahrenheit
- Relative Humidity Percentage / RH %
- AnalogTotal
- hppcf
- ugm³
You can put each of these into a genericSensor field by clicking the checkboxes for which field number you want to go in which genericSensor field that you’ll later map on Tools.Valarm.net. For example if you don’t want the output count and just want temperature, humidity, analogtotal, hppcf, and ugm³ then the checkboxes in the screenshot here would all be shifted over 2 spots to the right. Verify for yourself what your outputs are by viewing the Conversation window in your virtualhub that shows what’s being received by each Serial sensor adapter from your AirBeam air quality sensors. The power is yours to choose what you want to monitor and send to Tools.Valarm.net!
Plug it all in!
 Now that your Serial sensor adapter modules are all set up you can connect them to any of your sensor hubs using micro to micro USB cables. In the photo here you’ll see that in addition to the AirBeam air quality sensor, we’ve also got this sensor hub connected to a Meteo sensor and a SPI sensor adapter connected to an Alphasense OPC-N2 Optical Particle Counter Sensor that measures particulates like dust, PM1, PM2.5, and PM10.
You can also plug in your GPS / GNSS sensors to your sensor hubs. When your GPS sensor modules have a solid fix and solid green light on the sensor boards, then you’ll automatically see the coordinates and locations associated with each of your air quality sensor data readings / measurements on Tools.Valarm.net, like you see in the 3D Earth Globe Map Screenshots on this write-up!
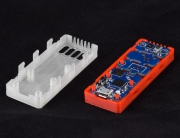
If you need Enclosures / Cases for any of your equipment modules you can get them here at Shop.Valarm.net.
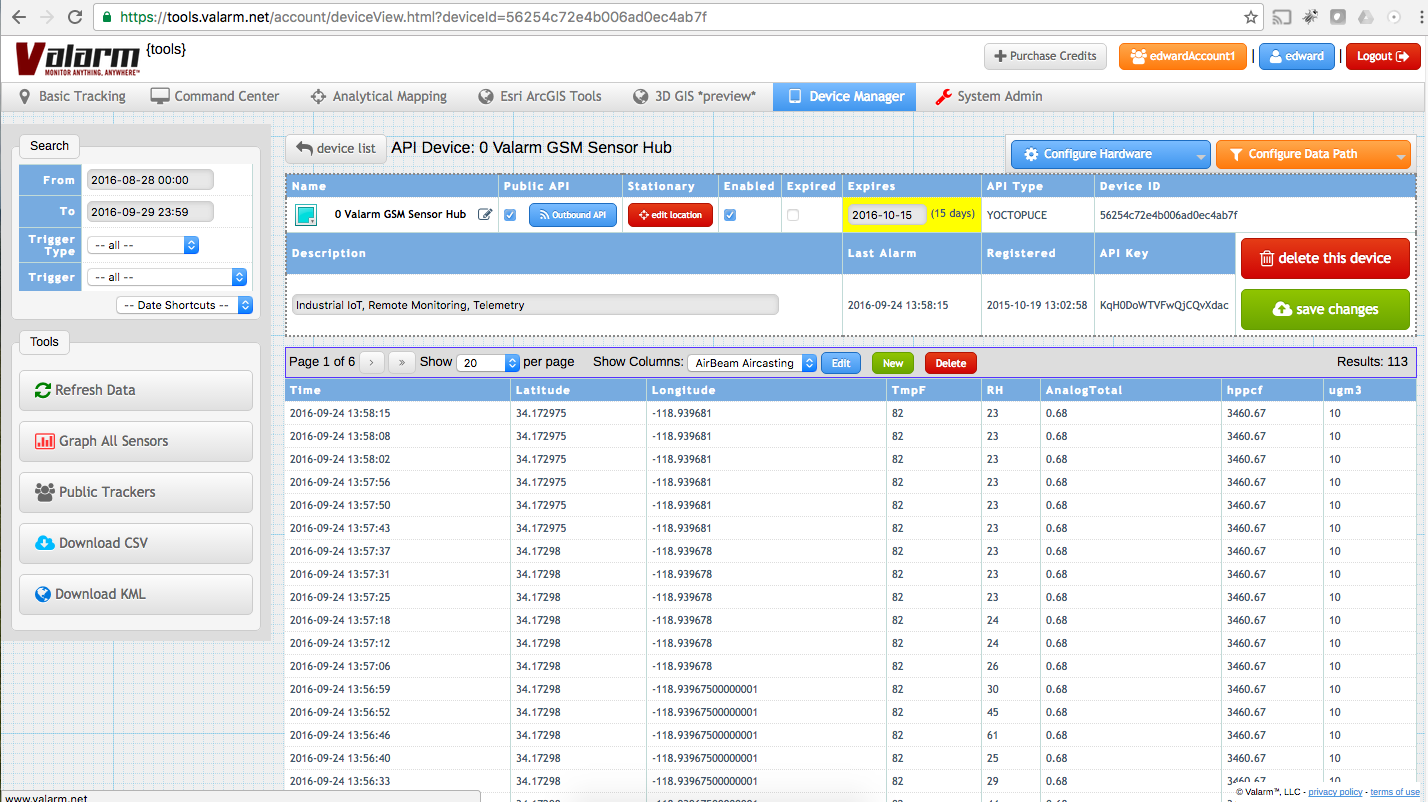
Your sensor hubs will automatically send AirBeam sensor information to Valarm Tools Cloud via the internet connectivity you chose when buying your sensor hubs from Shop.Valarm.net, whether it’s 3G GSM cell network, ethernet, or WiFi. Configure and link your sensor hub to Valarm Tools Cloud by following this < 4-minute, step-by-step video tutorial. Plug your sensor hubs into 5V power sources and you’re ready for the next step.
Want to use solar panels and sun power? Have a look at these air quality monitoring boxes and our Industrial IoT Customer Stories for more details on how to use solar power with Valarm remote monitoring / sensor telemetry units in weatherproof boxes.
 Login to your account on Valarm Tools Cloud / Tools.Valarm.net if you’re not already logged in. Go to the Device Manager tab and click the name of your device.
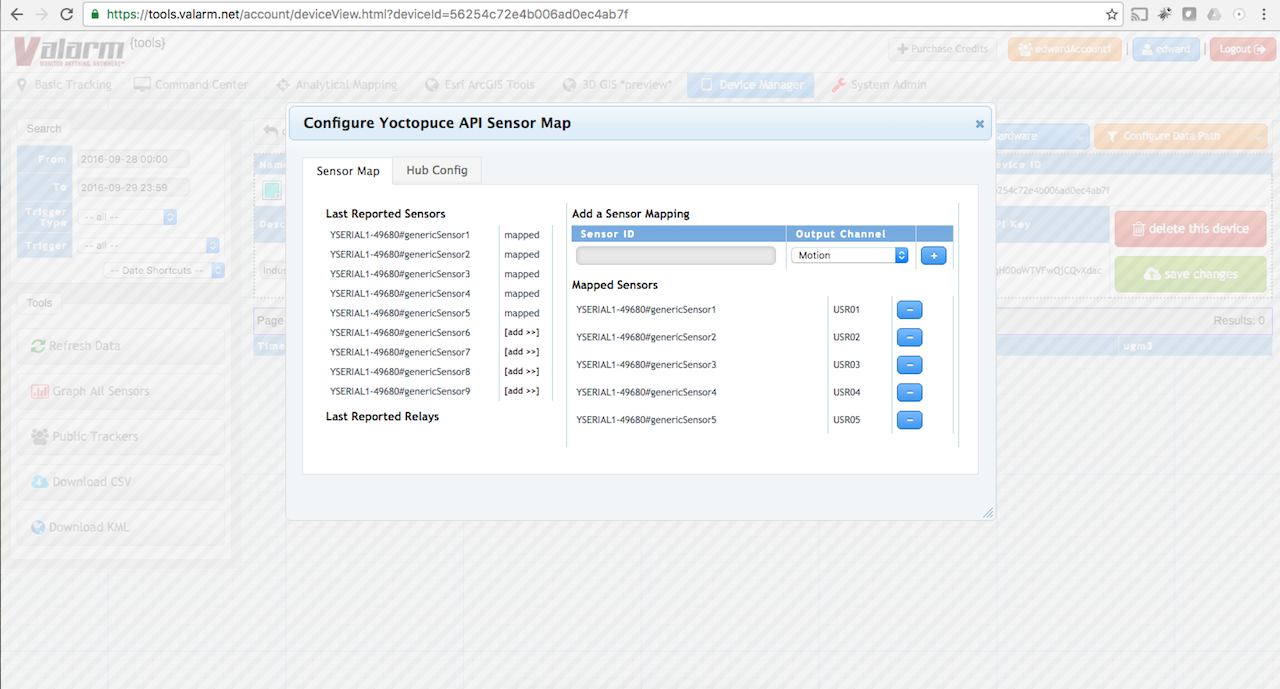
Mouse over Configure Hardware, then click Configure Yocto Hub. You’ll see the Sensor Map Configuration Screen like in the Tools.Valarm.net screenshot here.
In this window you can map the AirBeam sensor values into any Valarm Tools Cloud sensor fields / columns that you desire.
 For example, you’ll see in the screenshot that we used the User1 – User5 generic columns. These fields / columns are for custom sensor values like you’re doing with these AirBeam air quality sensors.
After this, you’ve got the option to rename the sensor fields and columns by following the step-by-step tutorial instructions in this write-up. You can see in the screenshot we did this and named the columns to make it more obvious for everyone:
- TmpF (Temperature in Fahrenheit)
- RH (Relative Humidity Percentage %)
- AnalogTotal
- hppcf
- ugm3
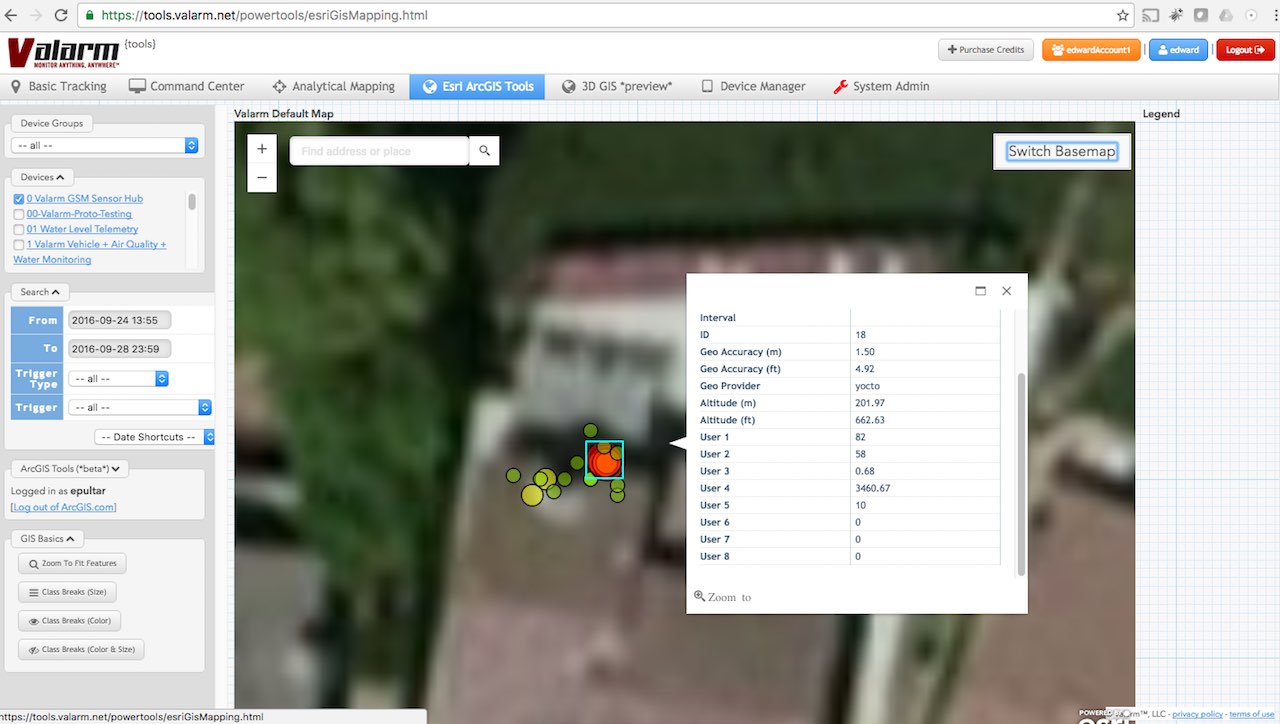
Now you can do all the fancy stuff with Valarm Tools Cloud / Tools.Valarm.net like mapping (in 2D and 3D virtual earth globes!), graphing, downloading your data for further analysis, or using our APIs to push your AirBeam air quality sensor data into your business intelligence / analytics systems.
That’s your overview on how to use AirBeam AirCasting air quality sensors with Valarm Tools Cloud / Tools.Valarm.net. You can set up E-mail alerts or SMS / Text Message alerts for custom thresholds so you’ll be alerted when any air quality or other sensor value goes above, beyond, below, within, or outside of your desired range.
 Want web dashboards for visualizing air quality and other sensor measurements? Have a look at our Industrial IoT web dashboards for sensor readings on your custom webpage with widgets, maps, and just exactly the gadgets you need.
Need to use other, more robust, industry standard air quality sensors like those made by Alphasense?
Have a look at our IIoT customer story about air quality monitoring with AQMD, a California government agency responsible for air quality monitoring and compliance.
See our Industrial IoT Customer Stories page for more real world stories of how to use Valarm Tools Cloud / Tools.Valarm.net for monitoring anything, anywhere, like water and fluids, or fleets of mobile assets like vehicles, trucks, and trailers loaded up with industrial equipment like pumps, vacuums, and tanks!

 Questions?
Please don’t hesitate to Contact Us at Info@Valarm.net if you have any questions!