Your Geofencing tools are now live on Tools.Valarm.net .
You, your teams, and your organization can make geofences that trigger when your IoT devices are inside or outside of your customized zones.
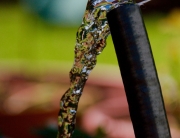
Watch the video above for a quick overview to get your started on how to make geofences for tracking and alerting based on the locations of your industrial equipment, tanks, water sensors, or anything else you’re monitoring with Valarm Tools Cloud.
Questions?
Get in touch with us at Info@Valarm.net
Video Voiceover / Transcript:
Howdy, this is Edward from Valarm.
In this video you’ll learn the basics of how geofencing works on Tools.Valarm.net
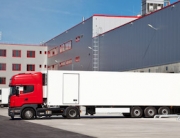
Tools.Valarm.net software monitors sensors made by any hardware manufacturer, like Industrial IoT sensors for water and air. Valarm Tools also monitors mobile assets, like vehicles, trucks, trailers, and other industrial equipment. That’s where geofencing comes in – tracking where mobile sensors currently are, while knowing whether or not they’re in a custom geofence zone that you’ve drawn on a map.
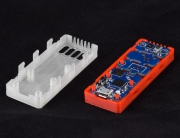
You, your teams, and your organization, can use GPS and other sensors on anything to monitor any factors you need, whether it’s tank levels, gases, or other industrial equipment like you see our customers using here in this video. You’ll find your sensor hubs, sensors, and other hardware used in this video, is all available at Shop.Valarm.net
Let’s get started. First off you’ll log in to your Tools.Valarm.net accounts
Then click the Geofences menu along the top.
Click the button on the left side of the Geofences window to make a new geofence collection.
Give your geofence a name and add some notes so you remember what your geofence collection is for.
After you’ve saved your new geofence, remember to enable it and turn it on with the checkbox.
Next let’s add a zone to this geofence collection by clicking the new zone button.
Now move the map to where you want to draw your geofence. You can use your standard map tools like zooming in and out, or hold shift and click, then drag to zoom to a particular area.
Here in this example we’ll draw a geofence zone around the LAX airport in Los Angeles, California.
Click the polygon tool when you’re ready to draw. Click your mouse for each vertex you’d like to draw. Then when you’re done drawing your geofence zone you’ll double click in order to finish your polygon.
After you’ve drawn your polygon you’ll give it a name on the left. You can also choose the geofence trigger mode, whether you want to know when it’s true if your IoT device is inside or outside of your custom zone.
You’ll also set the output channel field where you’d like your geofence zone results to be saved on Tools.Valarm.net . For example, you can choose any of the calculated fields that you’re not already using for other IoT sensor measurements. The field you choose here will be marked as 1, true, or 0, false, depending on your trigger mode and where your Valarm device is. You can also set an event tag for CSV output or other advanced Valarm functionality. Last up, add notes about what this geofence zone is for so you and your teams can remember next time you look at it. Congratulations, you’ve just made your first geofence zone. Remember to save your work.
Now let’s add a second geofence zone around the city center and downtown. Click to add a new zone then follow the steps as above.
Give your geofence zone a name and output channel.
Move the map to where you need to draw your geofence zone.
Use the polygon tool to draw the vertices of your geofence then double click to finish your zone.
Remember that you can change your base maps at any time to make it easier to draw your geofence zones depending on your needs. And remember to activate your geofence collection as well as each of your geofence zones.
If you click the Devices button you’ll see that this geofence is not yet active for any devices. You’ll set that up in your Device Manager so you can start triggering geofences for IoT sensors from Shop.Valarm.net as well as other industrial assets like you see here.
Here is another example of geofences that we’ll use in this video demo tutorial. There are geofence zones for the northern part of town and downtown city center. Remember to activate your geofence collections and your zones.
Now go to your Device Manager and click the name of one of your IoT devices to configure your Valarm IoT device to integrate the geofence zones you’ve created. Under the orange Configure Data path menu you’ll click Geofences.
Use the drop down menu to select which geofence collection you’d like to activate for this device. Make sure that your geo fence zones are enabled and click the save button.
That’s it! Now your geofence zones are active and you can see the outputs in all of your Tools.Valarm.net features. You can set up a custom column layout to rename your geofence output fields to an alias that makes sense for you. Here we’ve made custom fields and nicknames for our 2 geofence zones – the northern part of town, and downtown in the city center.
Let’s take a look at our Valarm IoT devices on Esri ArcGIS maps. You can double click to zoom in or hold shift and drag to zoom to a specific location.
Here is our device on the map and we can confirm that its last known location is indeed in the northern part of town and the geofence zone we drew earlier. By clicking the device we see the latest sensor information, temperature, humidity, pressure, etc. and you can see in the calculated geofence fields that we are triggering the northern geofence as actively true and that we’re not inside the downtown city center geofence polygon we made.
You can also see your geofenced IoT devices on 3D earth globes. Here on Esri ArcGIS Earth we see our Valarm IoT device in its last known location. You can customize which of your sensor fields and variables are used for visualizing your device’s height and color. Here we’re visualizing the height of our IoT device by using our geofence zone’s calculated field column we made earlier that confirms our industrial assets are in our custom northern geofence zone.
That’s your overview of making geofence zones on Tools.Valarm.net. That’ll get you started making your own geofences, so get on out there and do it.
You’re now ready to use geofencing along with other Tools.Valarm.net features to effectively monitor water, air, industrial equipment, assets, and anything else that your organization needs to monitor with Industrial IoT sensors.
For more info and HowTo tutorials, have a look at our other videos, blog, and customer success stories page.
If you’ve got any questions, comments, or suggestions for additional Valarm Tools Cloud software features, then please don’t hesitate to get in touch with us at Info@Valarm.net .
And thank you for watching!